Welcome to the Lone Wolf Payment Portal
We've created this payment portal to simplify your payment options and streamline the payment process. Before Lone Wolf can activate your software, you must first set up your automated payment information in the Payment Portal.
You have two payment options:
- Direct payment from a bank account
- Direct billing to a credit card
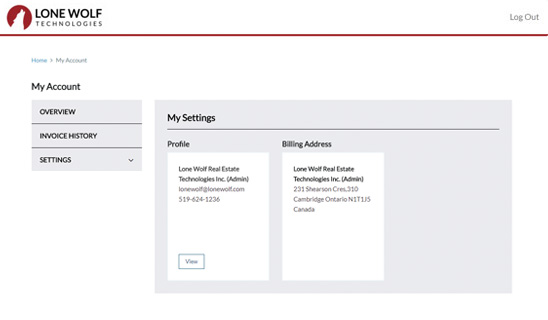
If you have multiple accounts with Lone Wolf, as some large brokerages do, you must set up the automated payment information for each account. You should have received an email from Lone Wolf Technologies with your login account information, including your login email and password, and the login URL.
Set Up Automated Payment Information:
- Access the Lone Wolf Payment Portal by clicking here.
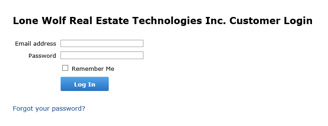
- Use the email address and password you received in your welcome email to log in. The Dashboard appears.
- Do one of the following:
- To have your Lone Wolf payments processed directly from a bank account, enter your bank payment information.
- To have your Lone Wolf payments charged directly to a credit card, enter your credit card information.
Note: If you enter both bank account information and credit card information for one Lone Wolf account, the first method you entered is the one that is used. Only enter multiple payment methods if you have multiple Lone Wolf accounts to pay for separately.
To enter U.S. bank payment information:
- Click on Settings > Bank Information.
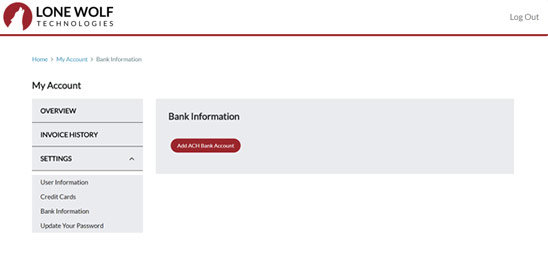
- Click Add ACH Bank Account.
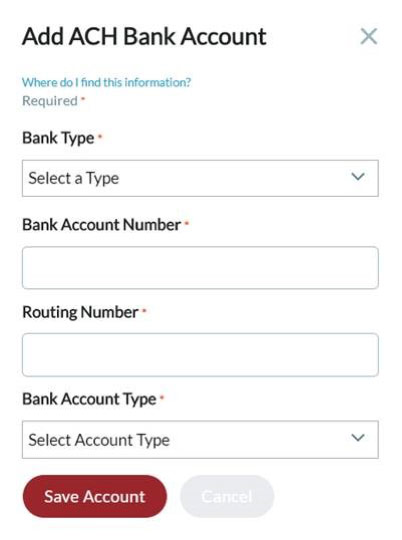
- Use the Bank Type dropdown to select whether this is the Primary or Secondary account.
- In the Bank Account Number field, enter your bank account number. For additional information on where to find your account number, reference the image below.
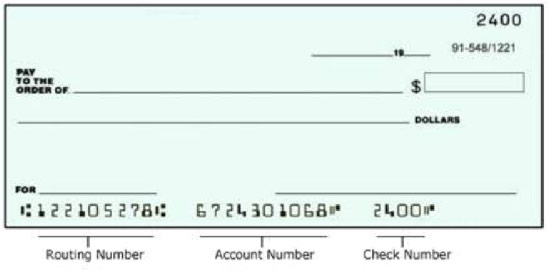
- In the Routing Number field, enter your routing number. For additional information on where to find your routing number, reference the image above.
- Use the Bank Account Type dropdown to select Checking or Savings.
The payment file format is US ACH - PPD, which is Automated Clearing House - Prearranged Payment & Deposit. - Click Save Account.
To enter Canadian bank payment information:
- Select Settings > Banking Information.
- Click Add ACH Bank Account
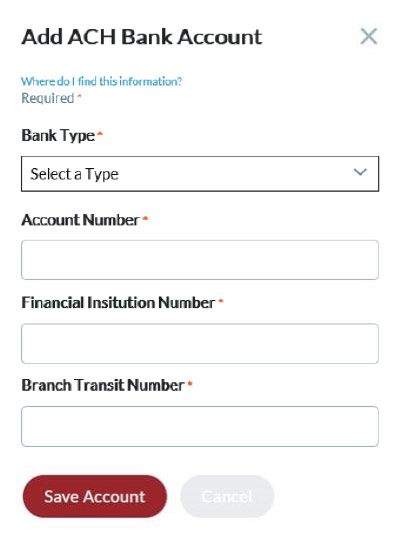
- Use the Bank Type dropdown to select whether this is the Primary or Secondary account.
- In the Account Number field, enter your bank account number. For additional information on where to find your account number, reference the image below.
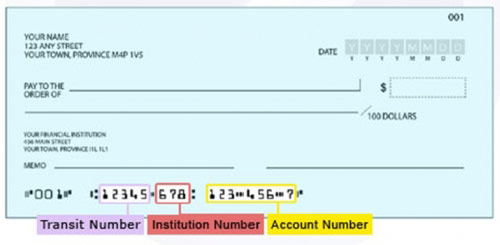
- In the Financial Institution Number field, enter the 3-digit number of your bank. For additional information on where to find your financial institution number, reference the image above.
- In the Branch Transit Number field, enter the transit number of your bank branch. For additional information on where to find your branch transit number, reference the image above.
- Click Save Account.
You can see the account information for this account by hovering over Bank Payment Details > Debit and selecting List Canadian Bank Details.
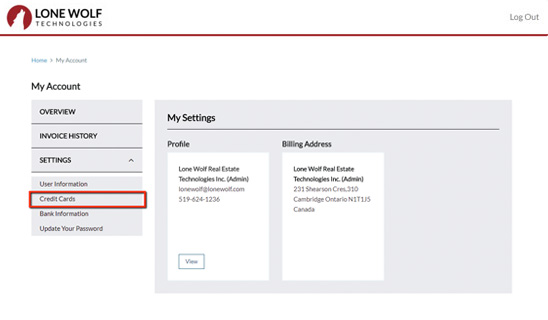
To enter credit card information:
- Select Settings > Credit Cards
- In the Credit Card Number field, enter your credit card number. The type of card will be automatically selected.
- In the Expiration Date fields, enter your credit card expiration month and year.
- In the Name on Card field, enter the name on the front of the credit card.
- Click Add Card to complete adding your credit card information.